
In this tutorial, we’ll plan a mini collection of greeting cards for the festive season. I’ll show you how I plan my collections and how you can start your own in Procreate. Making a greeting card collection is a great opportunity for you to share your work, as well as for other people to buy your work. Because you’re working at a small size, it is a perfect way to experiment with lettering and new topics. In this step-by-step guide, you’ll get my inspiration guide and colour swatches for Procreate to get started!
Supplies
- iPad & the Procreate app
- Optional: Procreate brush set from ‘Creating a Collection: Greeting Cards for Illustrators‘ Skillshare class (Download in the Project & Resources tab)
- The inspiration guide (Free download here)
- Colour palette (Free download here)
Step 1. Pick your topic!
We’re going to start with picking a topic for our greeting card collection. I’m going to go with a festive theme because greeting cards are a perfect time to pick specific events or times of the year when people might be interested in buying cards (If you’re looking for some inspiration or you’re not sure which direction to take this in, have a look at the guide in the supplies list!).
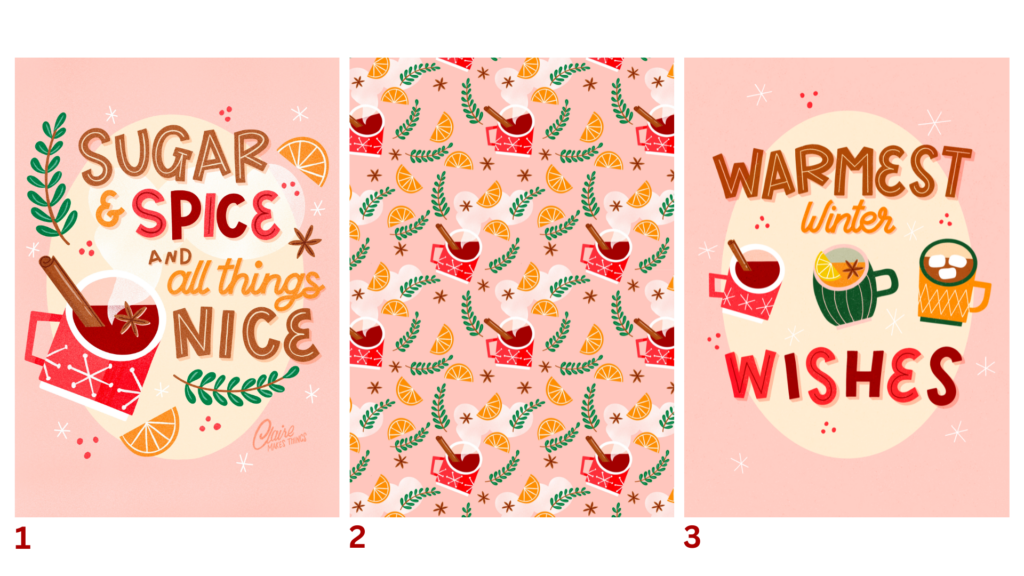
Our mini greeting card collection is going to consist of three pieces. The first one is going to be illustration and lettering together. The second one is going to be a pattern, and the third one is going to be an illustration. In this step-by-step guide, we’ll create our first design, because that one will set the tone for our collection. Afterwards, you can repurpose visual elements from that into piece number two and number three.
Step 2. thumbnail sketches
Let’s create a new Procreate canvas. A great place to start is to write down a specific topic that you would like to focus on that fits with your chosen theme, something visual. This way, you’ve got one specific visual topic to focus on, rather than picking a generic theme that leaves you with too many options and choices. I love everything to do with food and drinks. I’m thinking of maybe mulled wine, which is very festive.
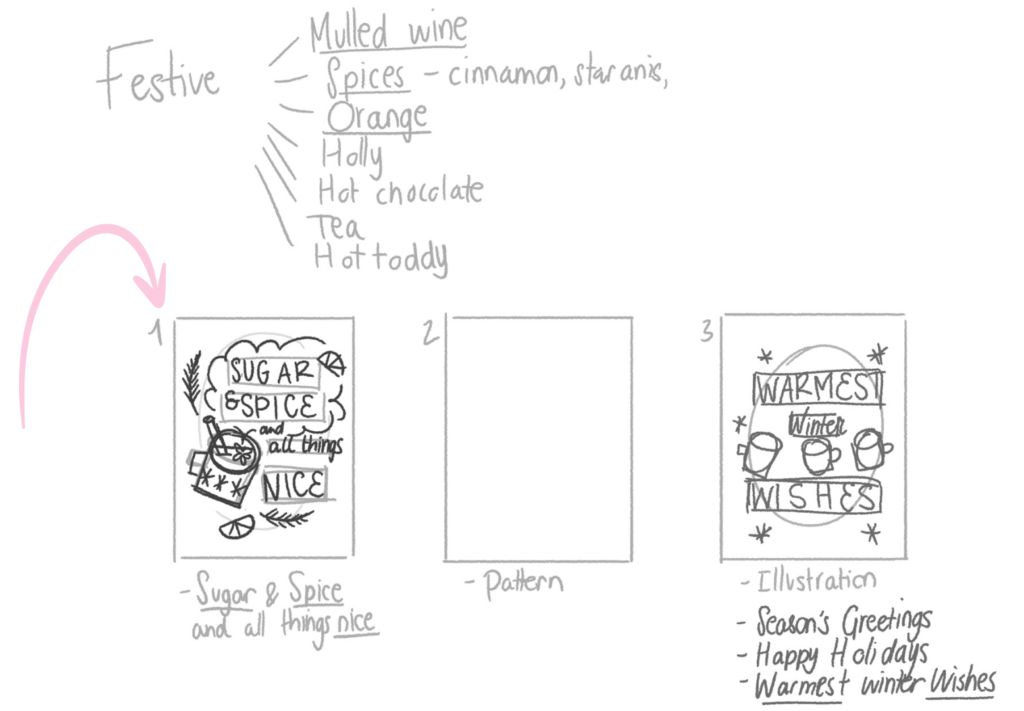
Next, we’ll start with our thumbnail sketch (number 1). We’re working in a vertical format, a greeting card format. Our first piece is going to be illustration and lettering, so we should think of what we want to add here. You could go for ‘happy holidays’ or ‘festive greetings’, perhaps even a pun or wordplay! Especially puns and wordplay work really well on greeting cards; they are memorable, can be tied to a fun illustration, and a fun! I’ll pick ‘sugar and spice and all things nice’, which works well with the sugar and spices in mulled wine (feel free to follow along!).
Just make sure to keep it short because you don’t want something really complicated for a greeting card design. Remember that greeting cards are usually a small size, so you don’t want something long and difficult to read. We’re adding illustrations to this, so we don’t want to fill up our page too much here.
We’re making a quick sketch to see how our mug, the mulled wine, will look together with our lettering. This is a basic thumbnail sketch, to see where everything fits on our canvas, so keep it simple. With the quote, because the emphasis is on sugar, spice and nice, (the words that rhyme), you want to make sure those are the biggest and everything else can go in between. You can use other visual elements, like orange slices, steam coming out of the mug, little stars, branches and more to fill up your composition and set the tone of your greeting card.
When your thumbnail sketch is done, double-check that you’ve added all the elements you want to add here. It’s just a really basic sketch, but it just helps us to see how everything fits together. This first piece is going to be the start of our mini-collection. You can sketch out your other designs (piece two and three) and this point as well, or leave sketch these after.
Step 3. Sketch your illustration and lettering in Procreate
Time to create the final sketch of the first piece of our greeting card collection! Because a thumbnail sketch is small and usually a little messy, we’re making a more detailed sketch before finalising the design in colour. We’re going to start with our canvas, and this is the final size that we’re using for our greeting cards. This is a high-quality size, so that it can be used for printing.
Remember! You can always scale your work down, but you cannot scale it up. Your work is just going to look pixelated. So start with a big canvas size. The size I use for greeting cards in Procreate: 1772 x 2506px, 300 dpi.
At this point, you can use your thumbnail sketch as a reference to sketch out the final piece (I like to copy the sketch layer to the new canvas, scale it up, and sketch on top!). At this point, I’ll use the Procreate brush set from my ‘Creating a Collection: Greeting Cards for Illustrators‘ Skillshare class, but they are not a necessity.
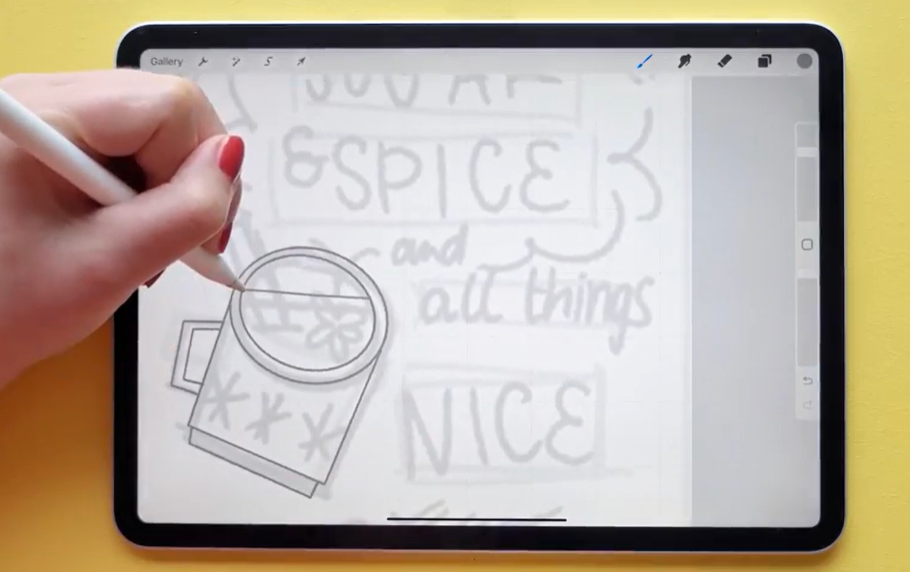
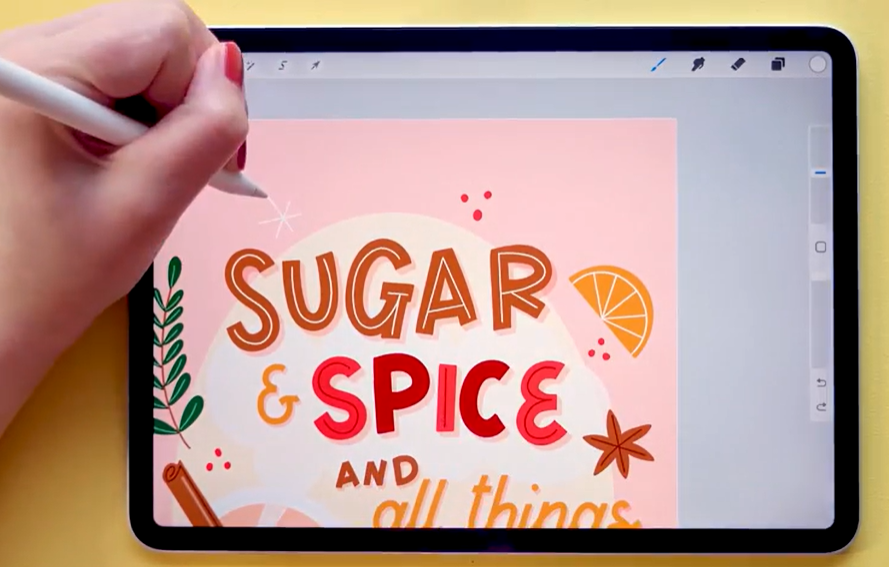
You can use a simple sketch brush to trace over the lines of your illustration and give it some more detail. For the mug, I’m using basic, graphic shapes. This makes it feel more retro and nostalgic and goes perfectly with a festive theme for the mug.
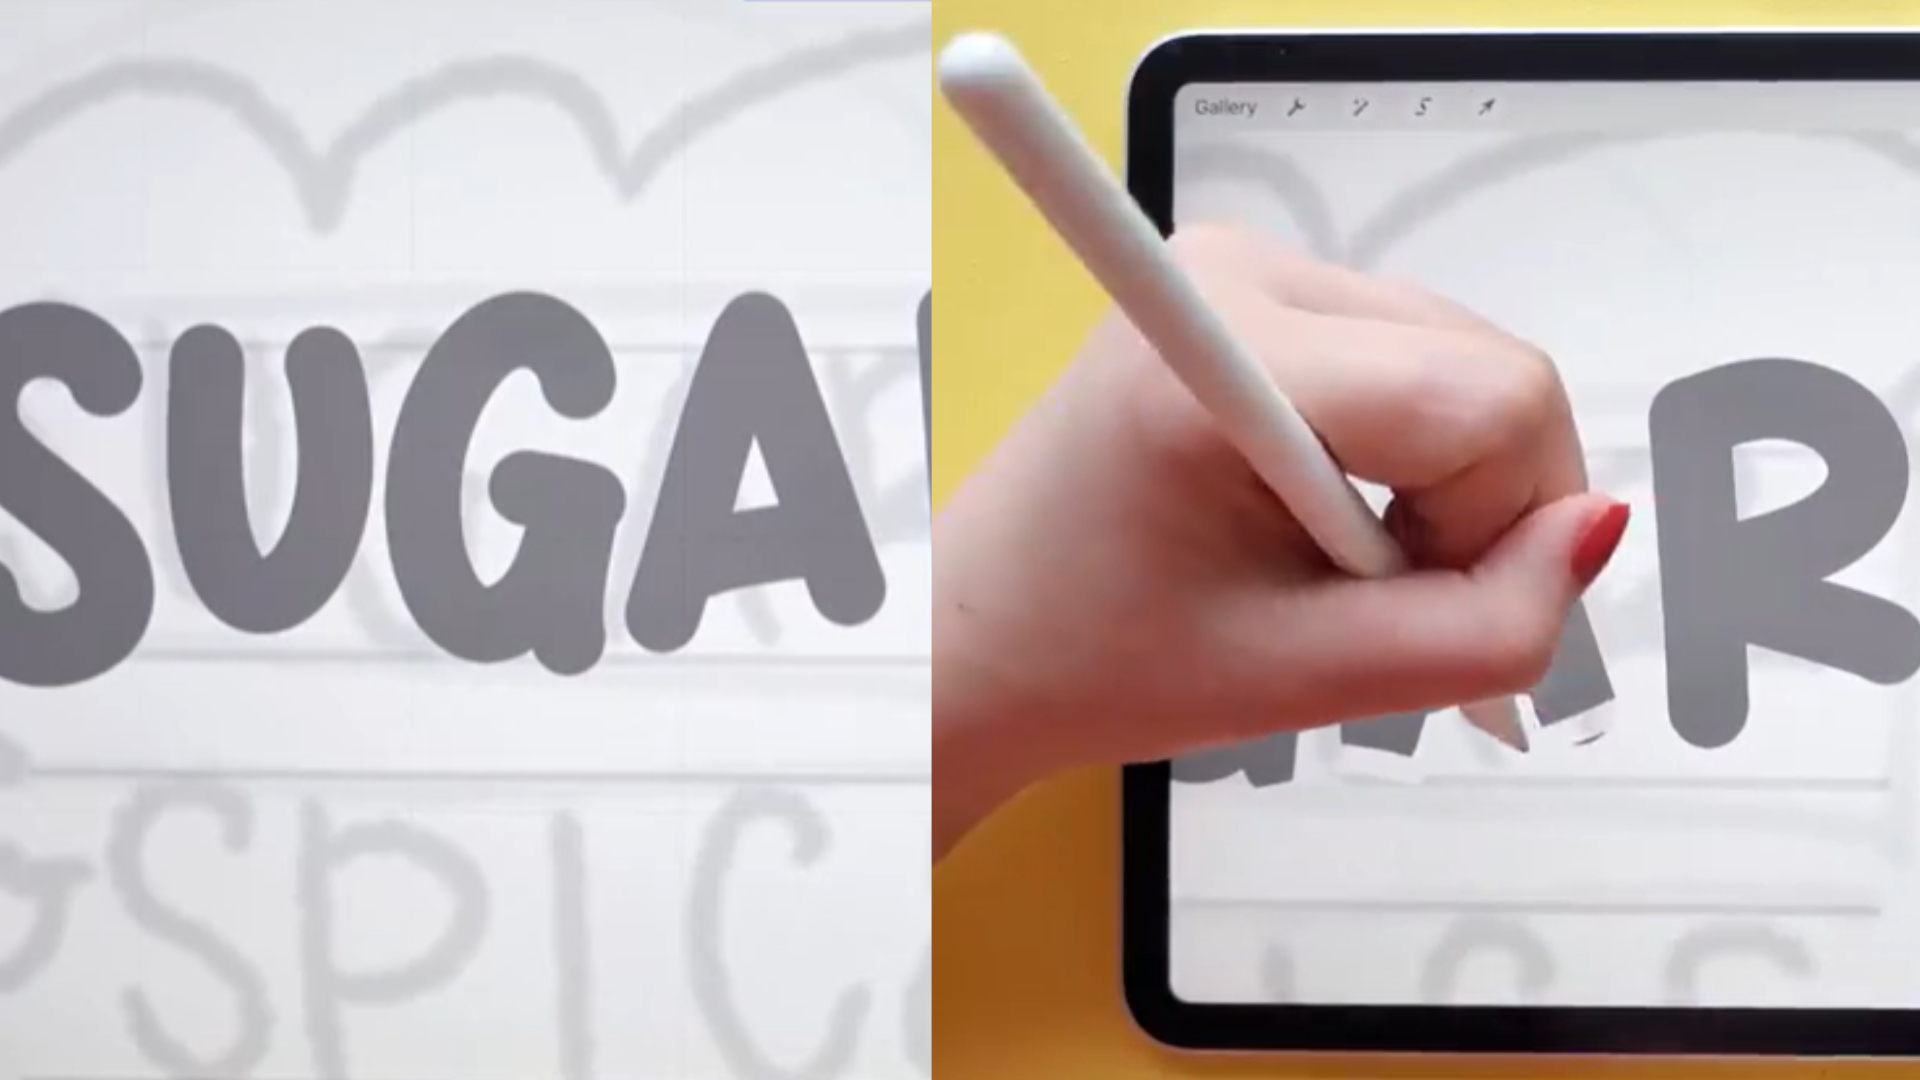
Next up we’re going to do the letters; we’ll use a simple trick for our lettering that I love using. If you’re a beginner in lettering, or you’re not feeling very confident in your skills, this trick will help. We’ll use the monoline brush for this (any smooth edge, bigger brush in Procreate will do too!). Start by adding the letters one by one; the size of your brush should be able to fill the letters completely. The letters can be wonky and imperfect; this makes them more fun! Then, with the eraser, cut off those round edges and make them flat (see image below). Now your letters look a lot more intentional. This is a really easy way to add these big bold letters while still making them look intentional.
Related article: Mastering Lettering: 7 Tips for Illustrators
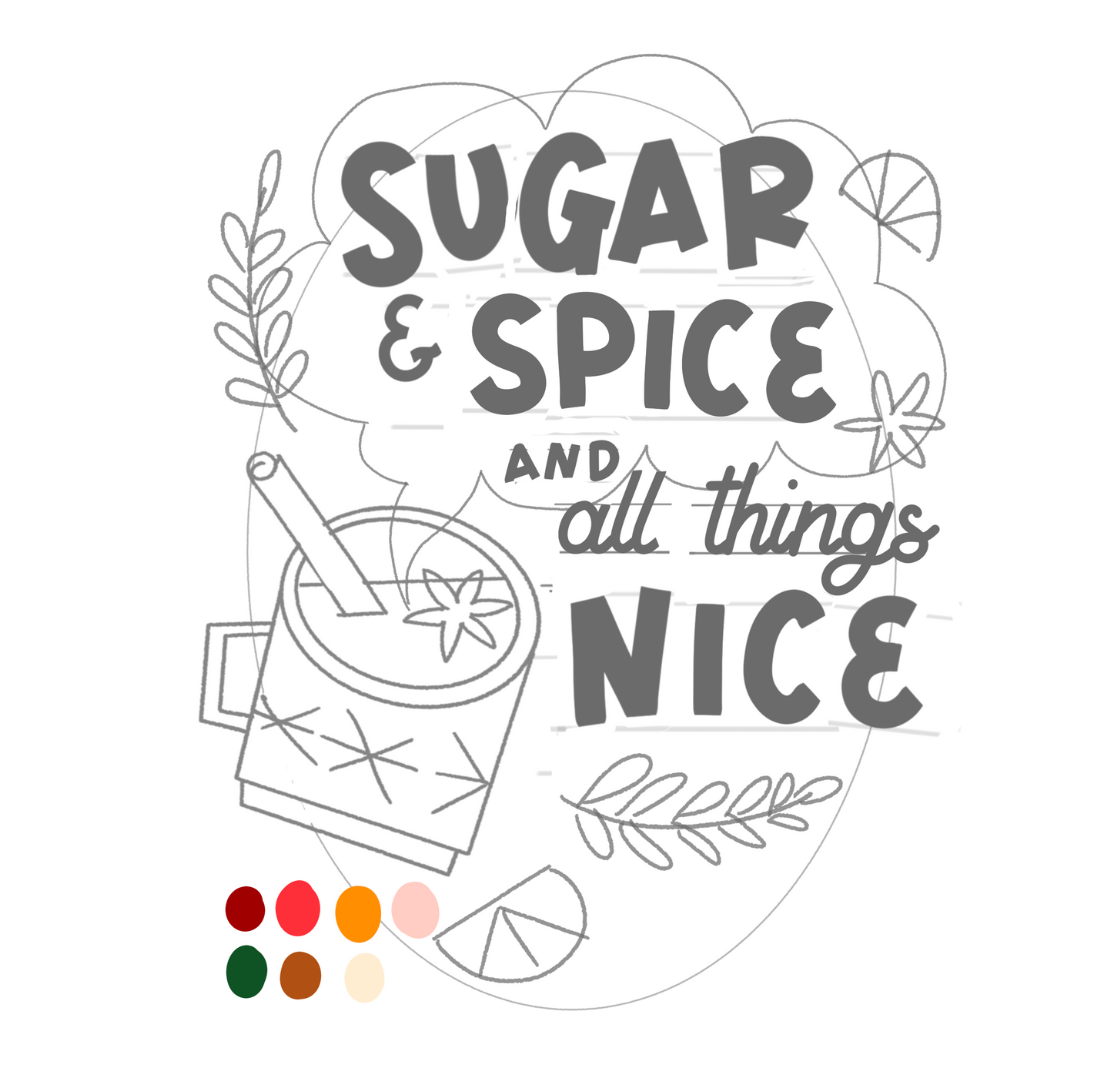
Then for the two last words that we have left, ‘all things’, let’s try some script. Finish off all details, and pick your final colours for the final design too (swatches for Procreate are here!) This is what the final sketch looks like:
Step 4. Time to colour!
Now it’s time to create the final design in colour! Start with filling in the background with beige and pink, and build up your illustration in layers from there.
For colouring, stick to smooth lines and clean shapes. This way, you can always change the final look of your illustration if you need to, especially if you’re working on a collection and you might want to revisit the project or make changes later. It’s easier to stick to textures on top, which we’re going to do later instead of having lots of different textures and maybe clipping masks between your layers!
For the letters, we do exactly the same thing we did before; monoline brush and erase the edges. We’re going to use brown, red and pink for the bigger words, and orange for the script letters.
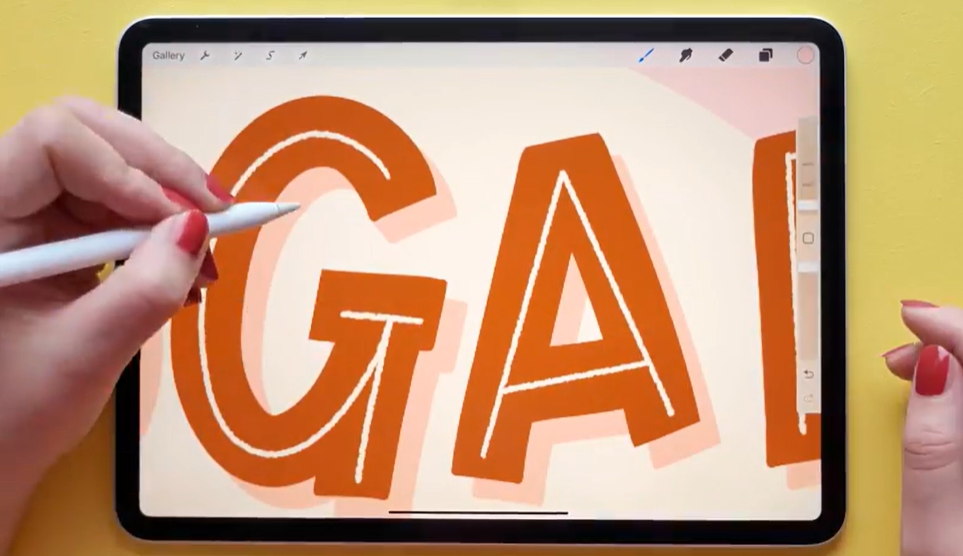
I’m using the felt tip brush (or a textured brush) to create an inline on top of our letters in beige; this is basically a simple line in the center of our letters. This immediately makes the lettering look a bit more retro.
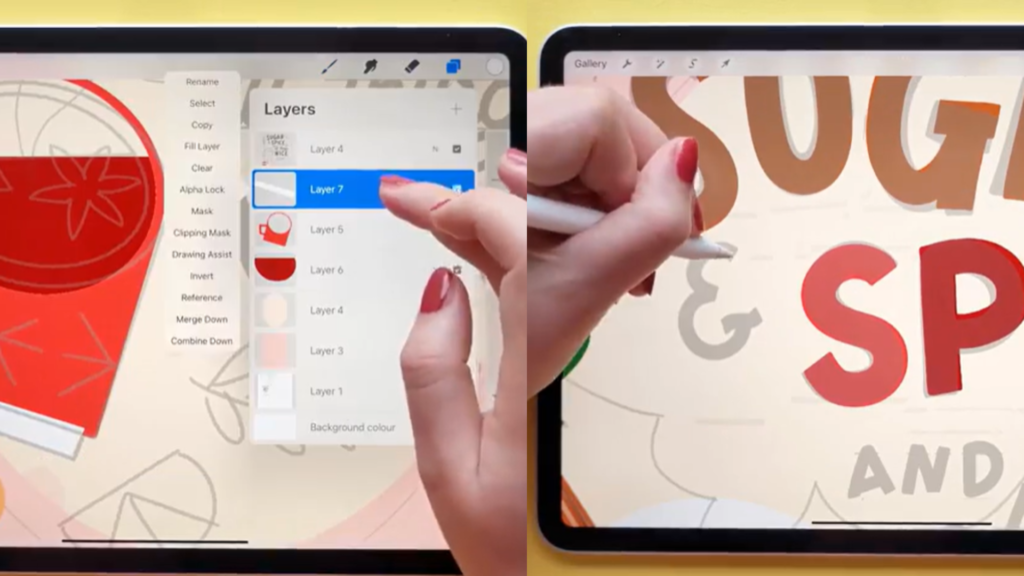
We’ll also add shading to the letters; we do this by duplicating our lettering layer, set it to Alpha lock, filling the layer with pink, and then moving the layer down slightly. Then, set the layer to multiply so we can actually see the pink and it doesn’t just disappear on our background, on the edges. Now, our letters look voluminous. Adding touches like this to your letters helps to refine your letters a bit more and and it makes your lettering look even more intentional.
Step 5. adding details and texture
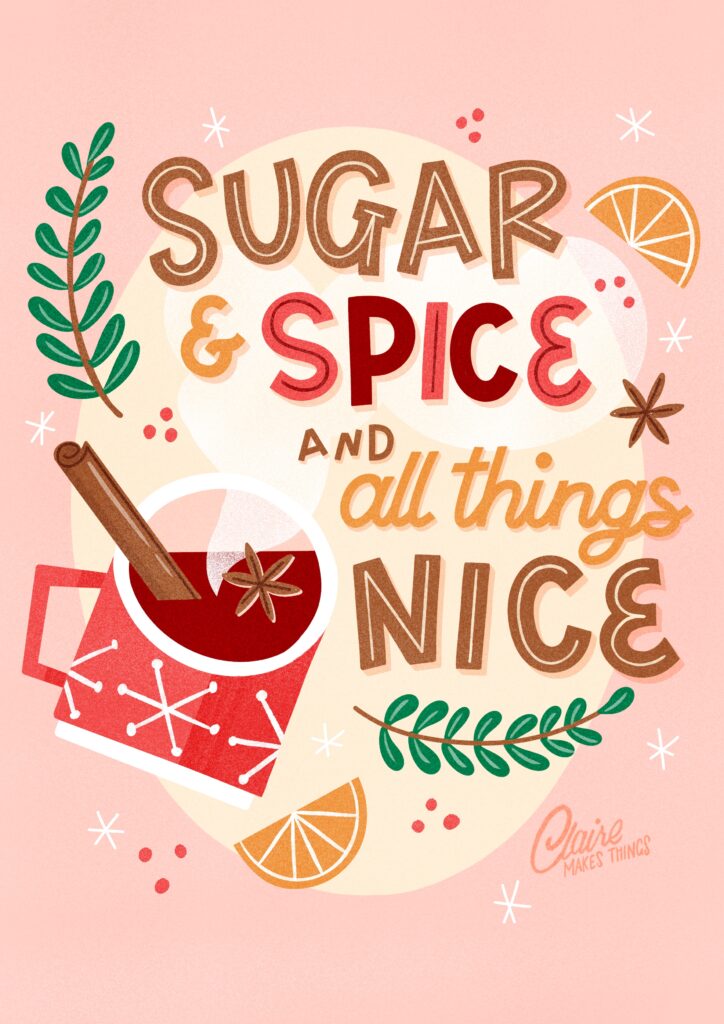
Lastly, we’ll add a few more details, starting with our illustrated filler elements, like orange slices and branches. This is optional, but I like to add a few details that fill up some of the blank space and set the mood.
Related article: Mastering Textures in Procreate: 3 Techniques for Illustrators
Filler elements are an easy way to fill up the blank space between and around your lettering. They’re also a great way to add to the tone or theme of your greeting card, and can help to add some pops of colour to your work.
Small illustrations are perfect for making a design feel festive (think stars, sparkles, baubles, etc), without having to add traditional themes or colours. Stepping away from Christmas trees, Santa, and red & green only makes your festive greeting cards stand out!
Lastly, before we finish this piece, we’re going to add texture to our greeting card design. This is just a really easy way to add some more textures on top of your illustration without having to apply that to all the different layers. Especially when you’re making greeting cards, knowing that they’re going to be printed perhaps at some point, It’s nice to add a texture like this because it makes it feel like it’s printed.
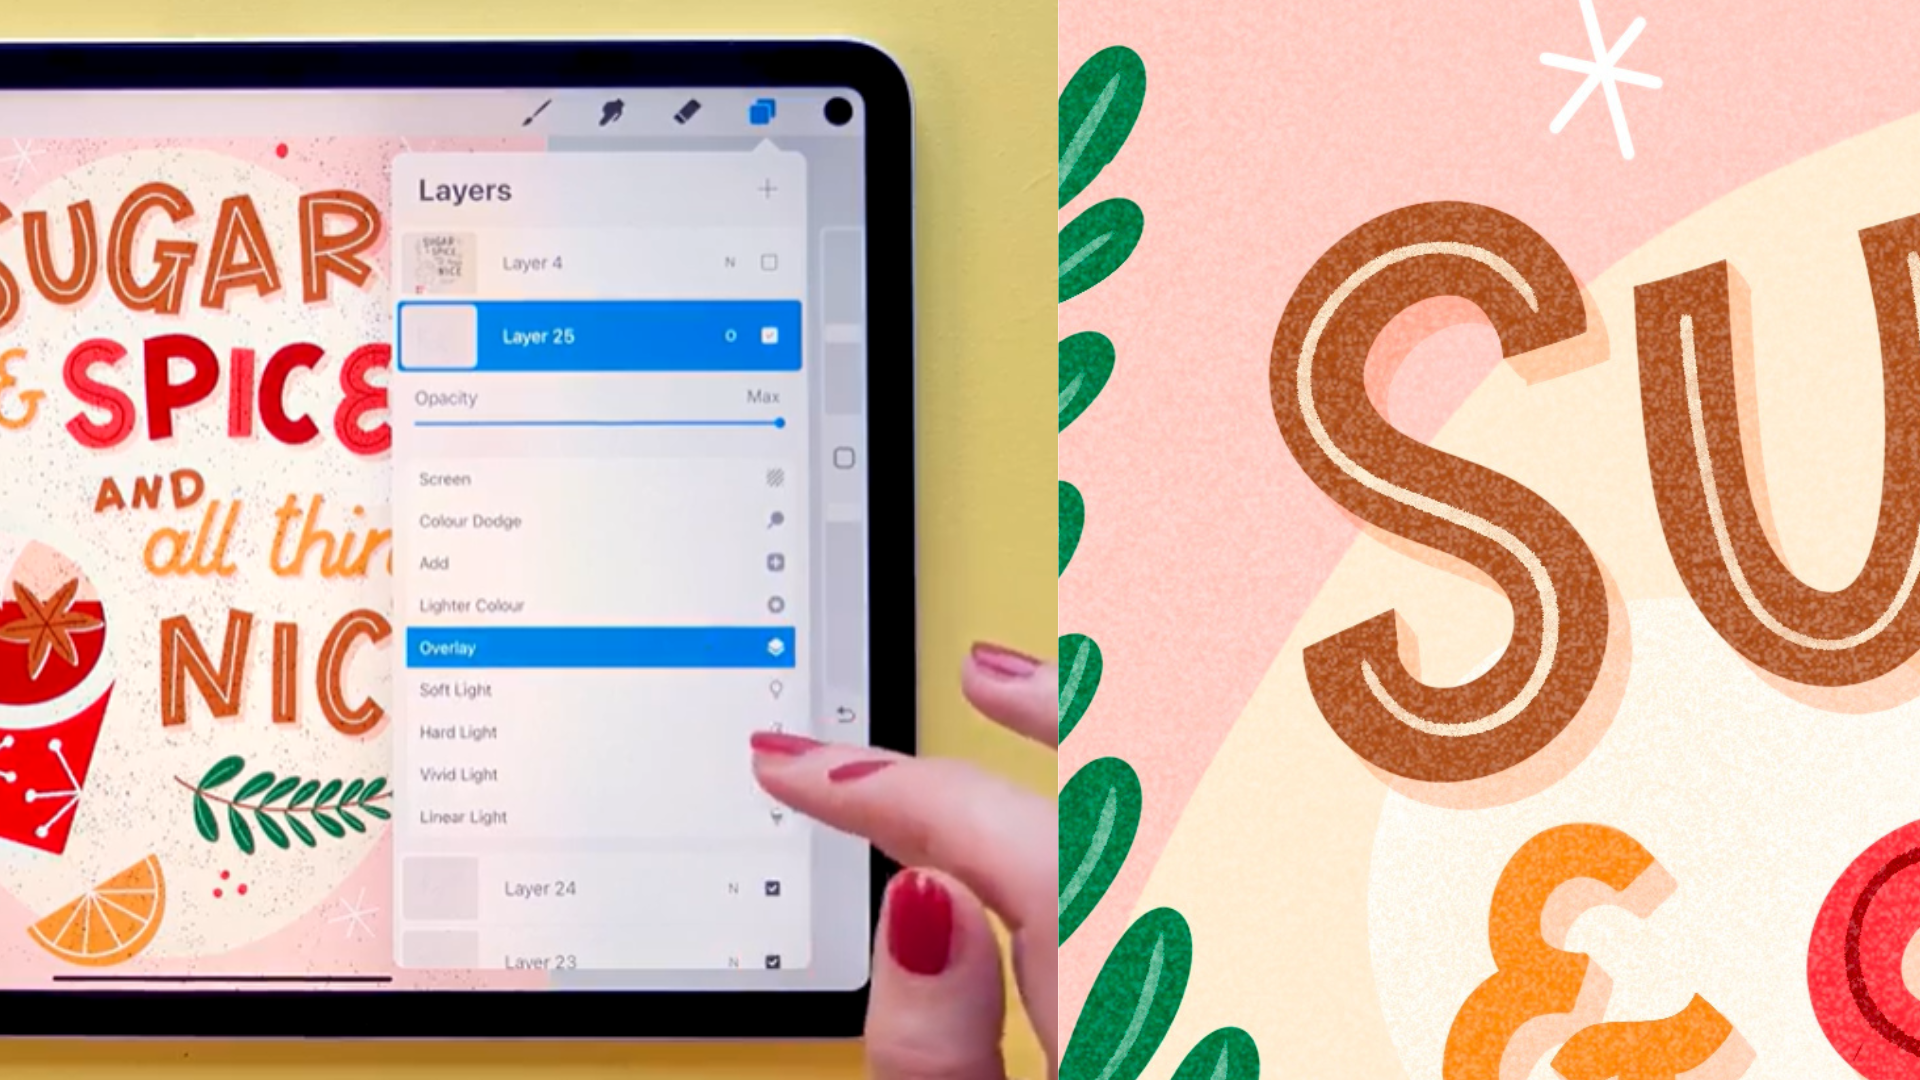
We do that by making a new layer on top, selecting black, and filling our entire layer with a noise brush or speckles (any big texture brush, on maximum size, will do!). We’re going to do the same thing on another layer. Next, we’ll use blending modes to turn these two black layers into texture, on top of our illustration. Set one layer to ‘overlay’, and the other to ‘difference’. Now, those layers change from black to coloured speckles and white speckles. By changing the opacity of those layers here, you can change the intensity of that texture on top. Now, our greeting card design is finished!
Step 6. Reuse elements to finish your greeting card collection
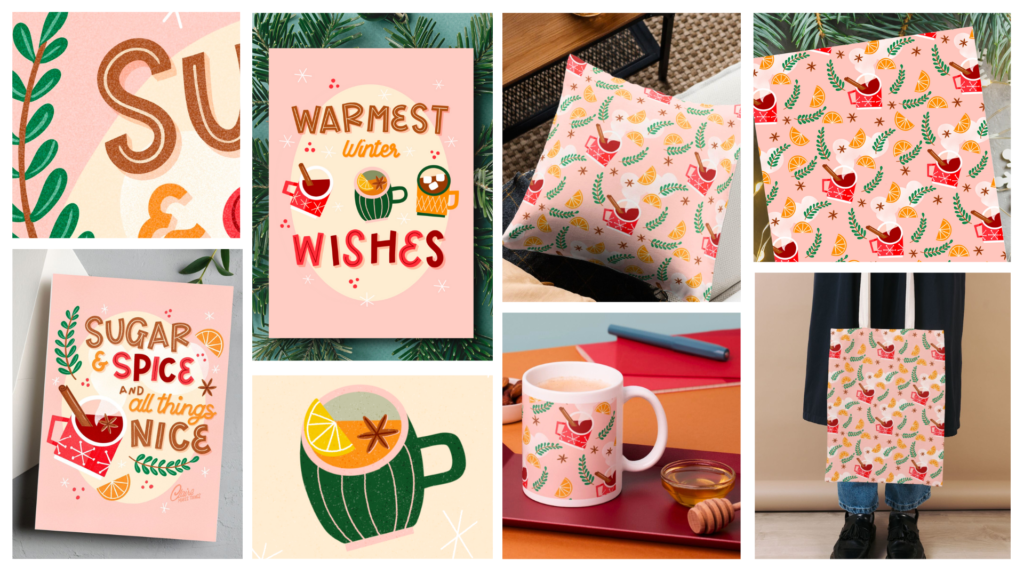
You finished your first greeting card, well done! If you want to finish your greeting card collection, go back to your planning phase and sketching phase, and follow the same steps. This time, with two new designs that match your theme, colours and textures. This way, you create unity in your collection. Don’t forget to reuse as many elements as you can in your other two pieces; this makes the process way easier and is the easiest way to unify your greeting card series. I like to add a pattern in the collection, that can be reused for surface pattern design too (as wallpaper, stationary and more!).
A collection should kind of look like a family. They are related by color, and the theme is very clear, and consistent in all three pieces.
Step 7. Present and share your work!
Almost there! Lastly, don’t forget to present your beautiful collection and share it. To give a little bit of context, so it’s immediately easy to understand that this is a greeting card collection; print your collection or use mockups to present your work! You can use Canva, Photoshop or even Procreate for this.
I hope you enjoyed this greeting card tutorial in Procreate. Don’t forget to share your work, even if it’s not finished! I would love to see what you create. Tag me here and send me a message: @claire.makesthings. And don’t forget to reach out if you have any questions!
Ready to learn more?
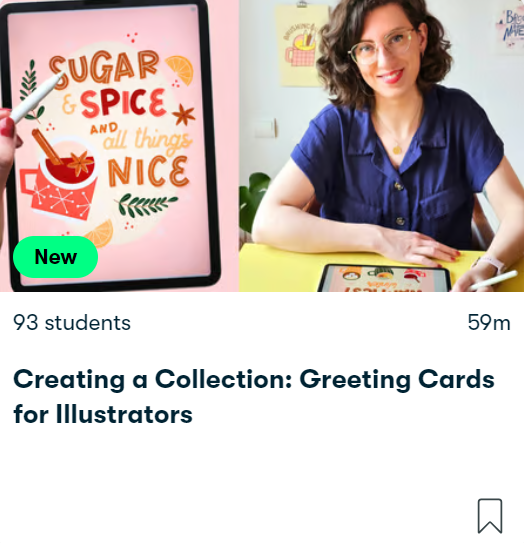
Learn how to build your mini collection of greeting cards in Procreate, using lettering, pattern design and more!
In this class, I’ll show you how to create a collection of greeting cards in Procreate, in more detail. By the end of this class, you’ll have your own collection of festive greeting card designs, plus a strategy for building your collections in the future. You’ll also receive my custom Procreate brush set!
Great class on starting a small collection of greeting cards with a few nice tips and tricks included as well. I really enjoyed it and I am looking forward to working on my own greeting cards now!
— RHONDA
Are you not on Skillshare yet? You can check out all of my classes using the free 1-month trial: Join me on Skillshare here to access all of these classes + lots more. This post contains affiliate links. This means if you buy something (like a Skillshare membership) through one of these links, I get a commission at no cost to you!
Subscribe to my monthly newsletter for regular updates: