
Using textures in Procreate allows you to express your unique style in your illustrations and helps you set the tone of your work. I use textures in the form of layers, brushes and masks, to make my illustrations more engaging and personal. I’ll share three steps you can take to use textures to show your unique style in Procreate.
1. Using textures to set the tone of your illustrations
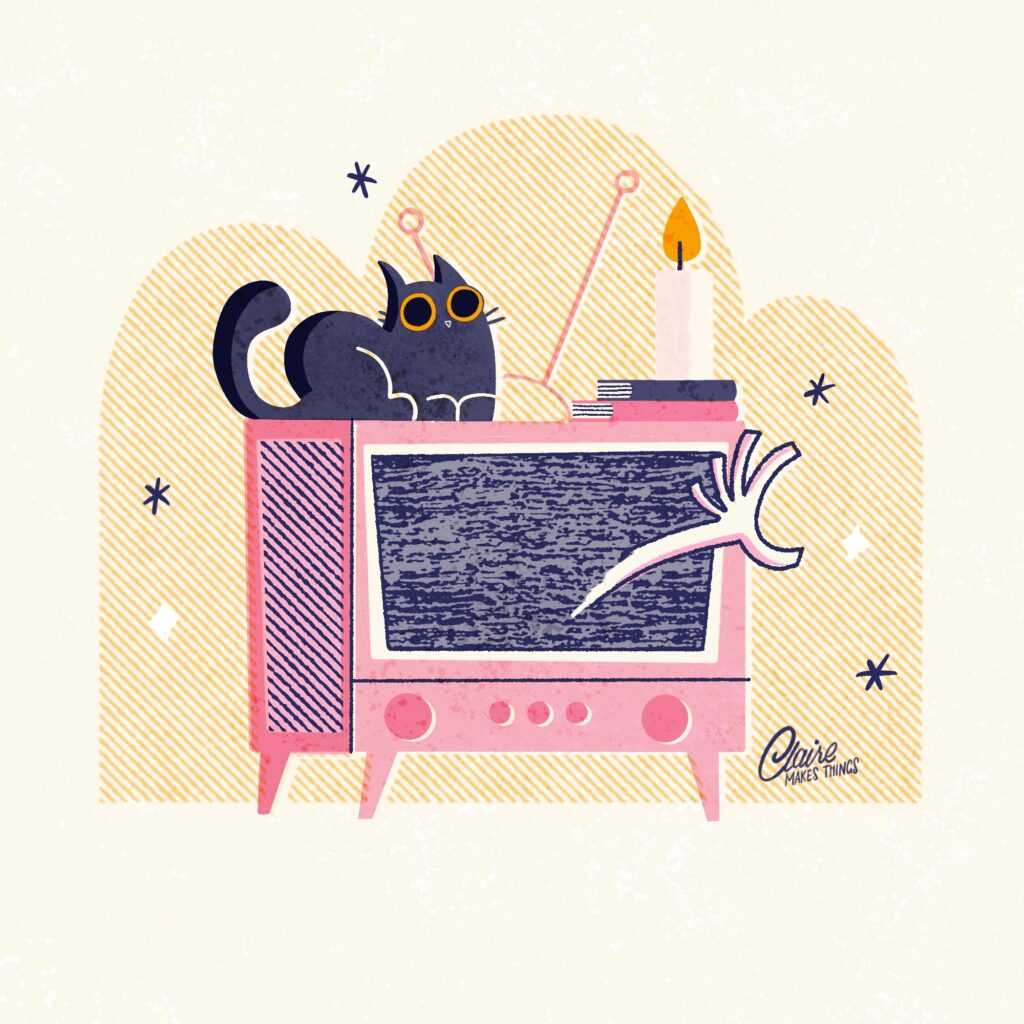
Using textures in illustration is a powerful way to set the tone and mood of your work, and add depth and dimension. Textures can evoke emotions, suggest atmosphere or a time period, and guide the viewer’s perception of your artwork. This is also a great way to add your unique point of view; I personally love being inspired by artwork from the 1960s and ’70s, and using textures to evoke that era even when the concept isn’t explicitly retro. Here are a few examples of how texture changes the tone of your illustrations and how to select appropriate textures:
- Texture and History: For a retro or nostalgic feel, you can use textures like distressed paper, grain, or worn fabric. These textures can evoke a sense of age and history, adding warmth and familiarity. For a 1960s or ’70s look, you can look into using halftones; these mimic the halftone printing process that was used in that era, and are a great way to bring back that retro feel.
- Focus with Texture: Use more pronounced textures in areas where you want to draw attention, and softer or less noticeable textures in the background. This helps guide the viewer’s eye and sets the focal points of your illustration. You could use a rougher brush for the foreground of your illustration to highlight those areas.
Related article: Brushes in Procreate: Tips to Improve Your Design Process
- Materials: Use textures that mimic certain materials where necessary, like wood grain, stone, or foliage. I like to use a rough speckled brush to mimic the feel of a chalkboard, for chalklettering designs. Mimicking natural materials and surfaces can make the scene feel more immersive and authentic, but also help to communicate the intended message or feel of your work. For more textures, check out the last few tabs in the Brush Library, like ‘Materials’, ‘Organic’ and ‘Textures’.
- Quirkiness: Using a rough or bold texture can enhance the handmade and authentic feel of your work. I enjoy using bold, playful brushes and textures to make my illustrations feel more whimsical and less perfect. This aligns with the lighthearted, more humorous take I like to work with. The opposite is also true; a smoother texture can showcase a more refined illustration. Using light and soft textures (perhaps watercolor washes, gentle gradients) can create a calming tone.
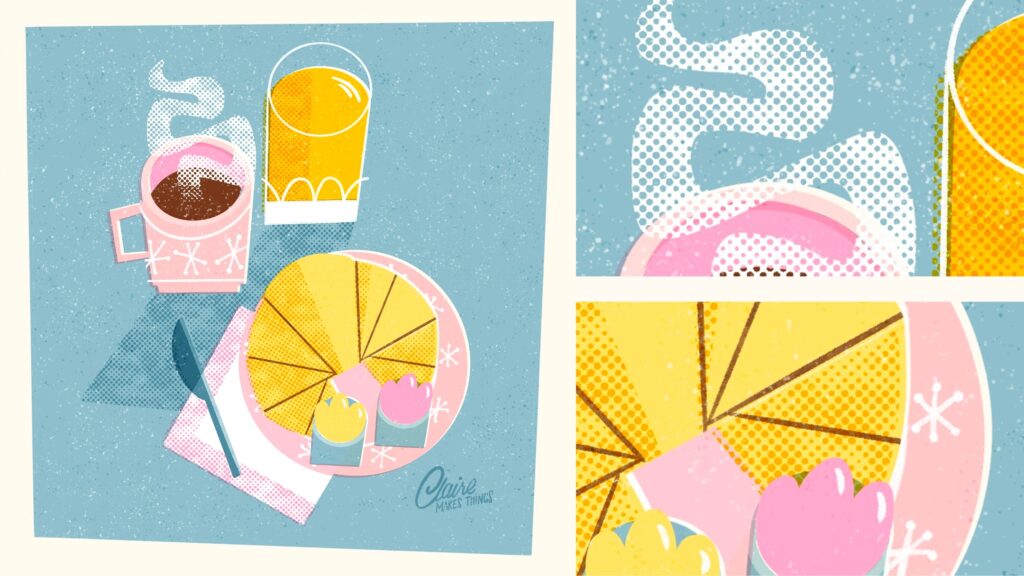
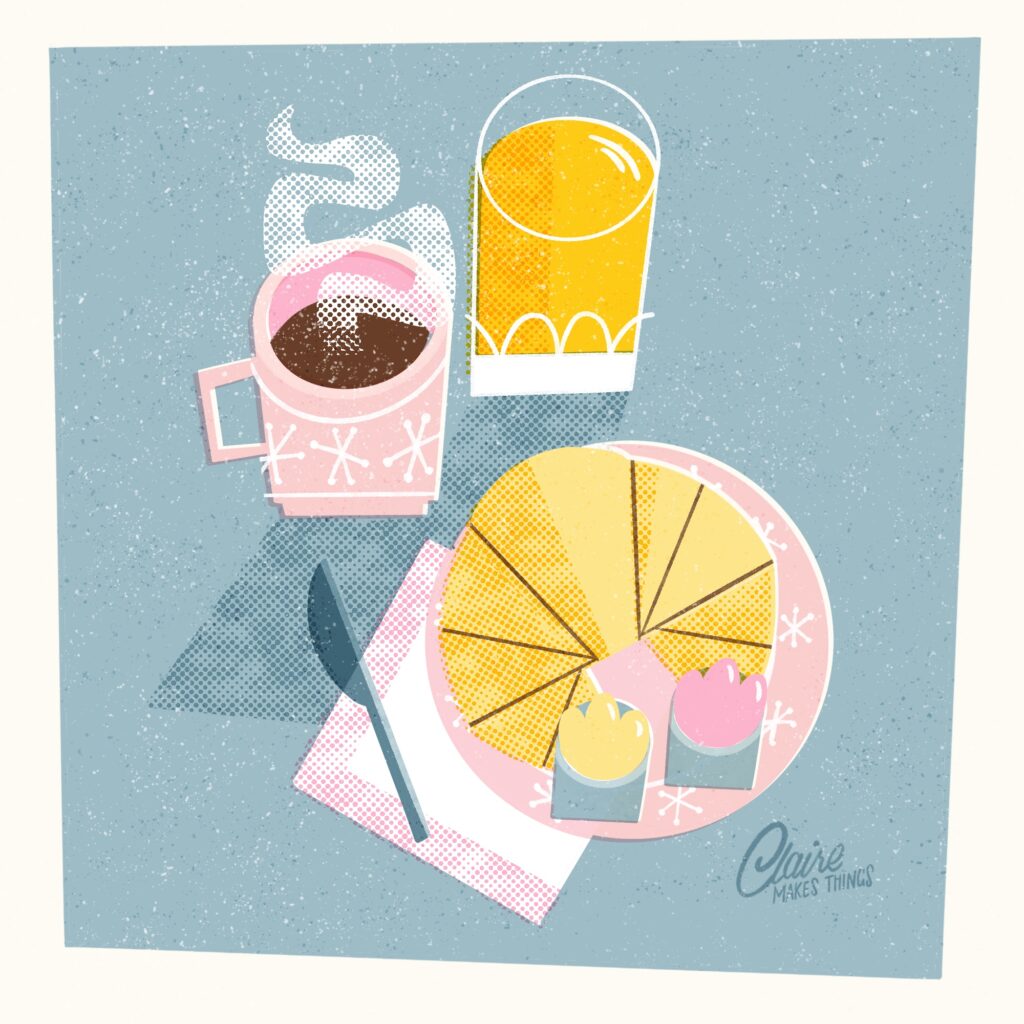
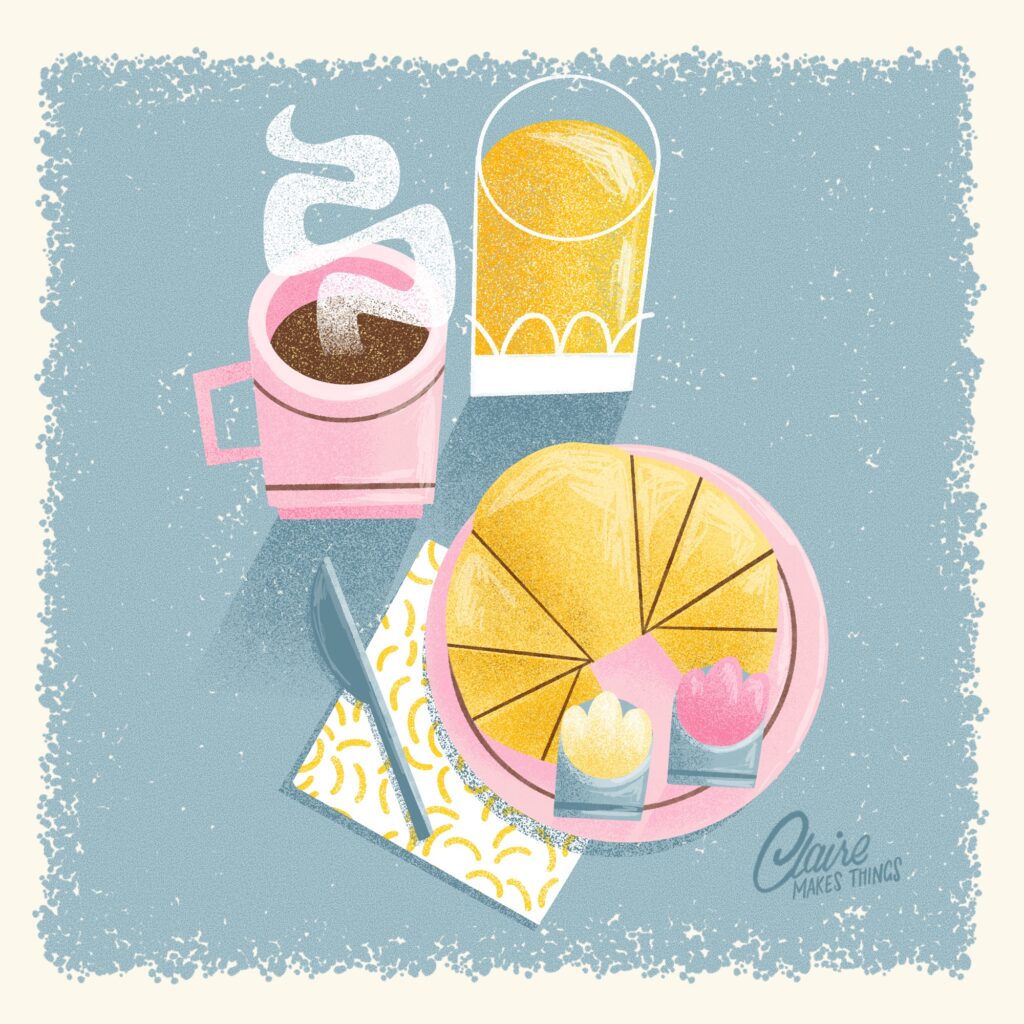
Experiment to Find the Right Tone; Don’t be afraid to experiment with different textures to see which best conveys the tone you’re aiming for. Sometimes, a texture you wouldn’t initially consider might end up being the perfect fit. Iterate and try different combinations to see how texture alone can influence the tone of your work. For example, look at these nearly identical illustrations I made in Procreate, and how texture changes the tone:
Keep in mind to always use your textures intentionally; you don’t need to add them to make your work feel finished. They are simply a way device to help you improve your illustrations.
2. layering textures and blending modes
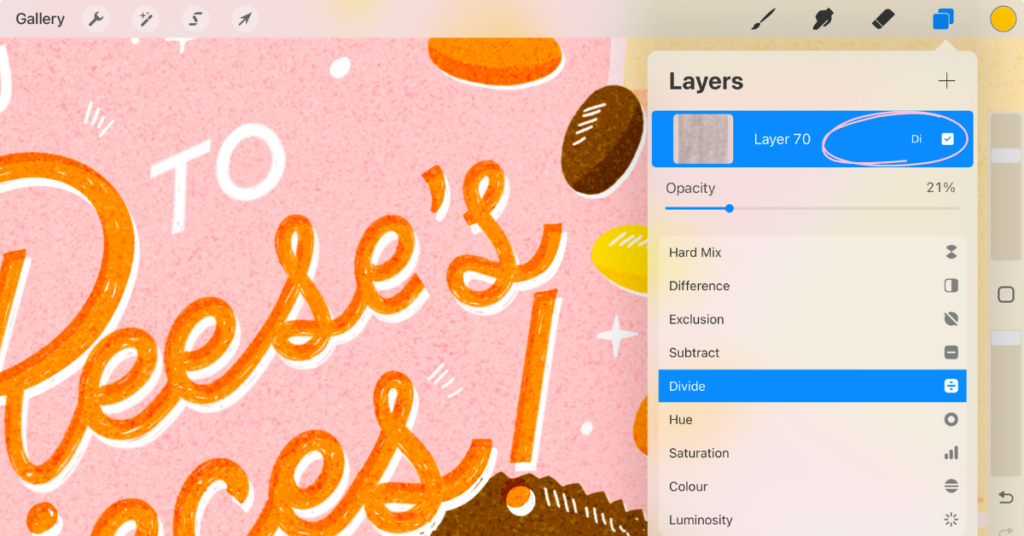
Procreate is perfect for adding these textures in the form of brushes, textured layers, mask layers, effects and more. Whenever you can, apply textures on separate layers to have more control over your work. Keep your brushes organized, and use layer masks rather than applying textures directly onto your layers. This allows for non-destructive editing and makes it easier to make adjustments later on if need be. Separate layers also allow you to use Blending Modes like Multiply, Overlay, or Soft Light. They change how your textures interact with your base illustration and give you a variety of options to experiment with. Here’s how to add a subtle texture on top of your work:
- Add a new layer on top of your existing layers
- Fill completely (or partially) with a speckled brush, noise brush or whichever you prefer (Check the ‘Materials’ tab for a suitable noise brush, which is perfect for this!). You can also import a texture as a photo and use this instead to fill your canvas.
- On the right-hand side of each layer, you’ll see one or more letters. These tell you which Blend Mode is active on your layer. By default, Normal mode is active, shown by the letter ‘N’. Tap it to open the Blend Modes menu. Set the blending mode to for example ‘difference’; this creates a subtle grain (depending on your chosen texture) in your illustration.
- Adjust the opacity to change the intensity of your texture.
Don’t forget to pick your textures wisely; Too much texture can overwhelm your illustration. Use texture to enhance, but not overshadow important details in your illustration.
3. Make your own texture brushes
Another way to apply textures to your illustrations in Procreate is by making your own textured brushes. I love importing my own textures into the Brush Library and creating new brushes. To do this yourself, open Procreate, go to the brush library and tap the “+” icon to create a new brush. Here are a few tips to help you out:
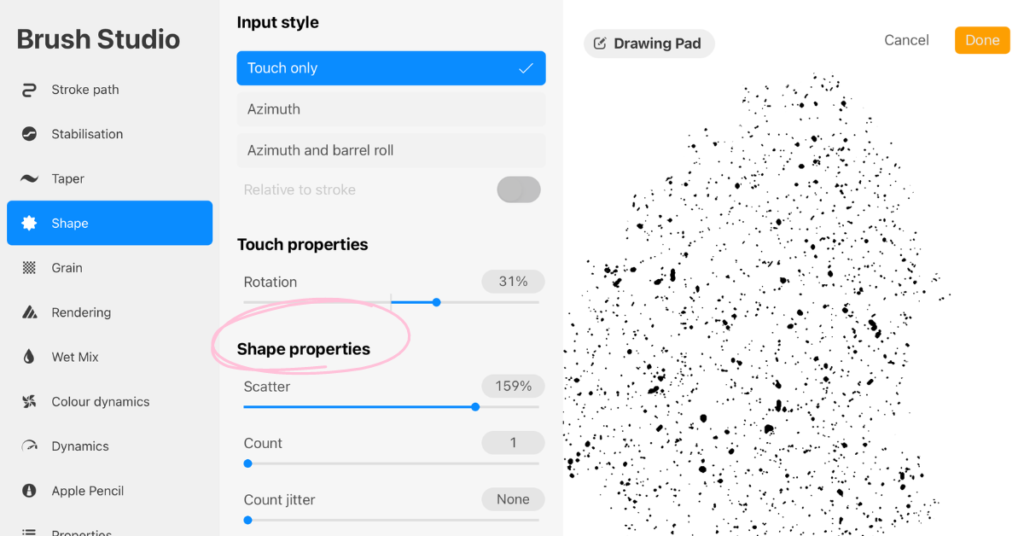
- Shape VS. Grain: Understanding the difference between these two elements in your brush settings is crucial for creating and customizing textured brushes. The Shape of a Procreate brush determines the outer form and edges of the stroke, giving the brush its fundamental outline. The Grain fills the interior of the shape with texture, adding detail and depth to the stroke. When creating or customizing brushes in Procreate, both Shape and Grain work together to define the overall appearance and behavior of the brush. You can import any image as a shape source or grain source to create custom-shaped brushes or use what is available in the Procreate library (plenty of options there too!).
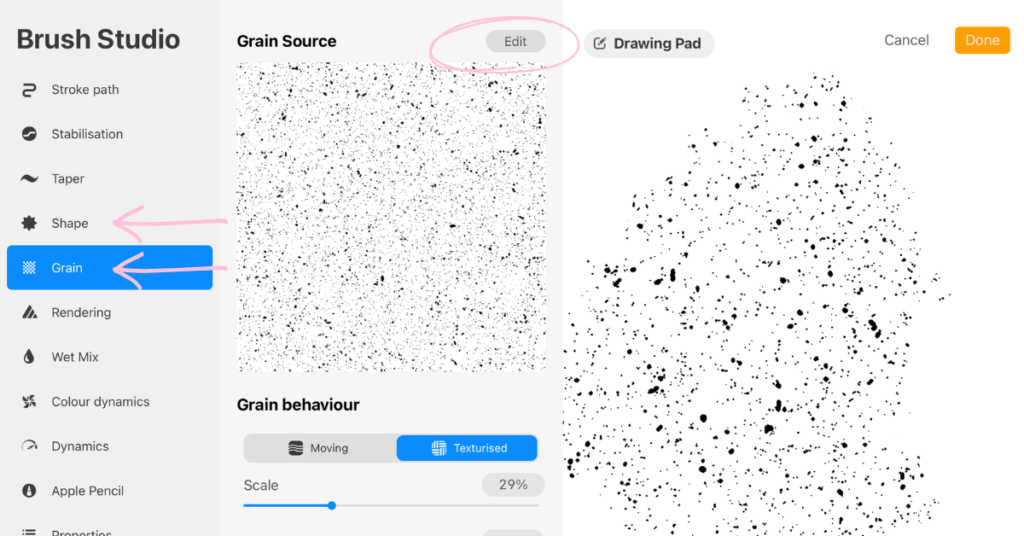
- Experiment with scale, direction and more: To make changes to your shape and grain, check the ‘Shape Properties’ and ‘Grain behaviour’ in their respective tabs. You can use the sliders to make loads of adjustments to change your brush. Also, adjust the ‘Spacing’ in ‘Stroke path’ at the top of your settings to control how the texture repeats along the brushstroke; lower spacing gives a smoother appearance, while higher spacing makes the texture more pronounced.
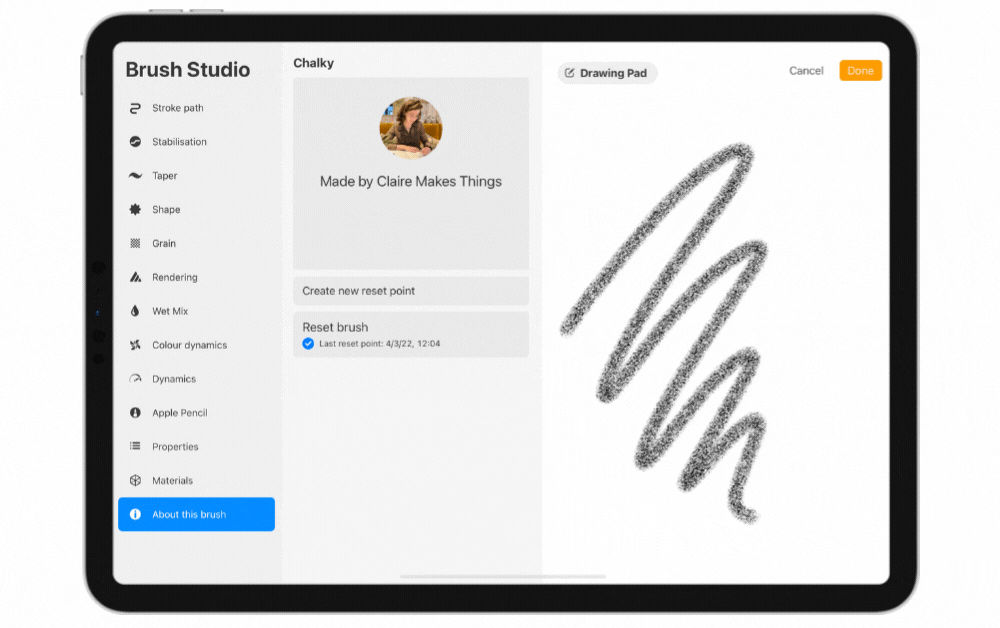
- Adjust existing brushes: All these adjustments can easily be made to existing brushes in the Brush Library to create an entirely new brush. If you change settings, make sure to either duplicate that brush to keep the original one separate, or use the ‘Create new reset point’ option in ‘About this brush’ to save the original settings. By tapping ‘reset brush’ you can always go back to the original adjustments.
And that’s it! You’re all set to create beautiful, unique illustrations in Procreate using textures. Incorporating these tips will help you make the most of using textures in Procreate, and help you to effectively set the tone of your work.
Ready to learn more?
Do you want to make your illustrations more authentic and personal, but not sure where to start?
In this Skillshare class, you’ll learn how to develop your personal style by using a variety of textures. Learn to create with confidence and put your personal stamp on your illustrations in Procreate. You’ll also receive my custom Procreate brush set for textures!
Highly recommended! An easy and fun way to learn how to include textures in your digital artworks, with great results.
— DENISE R
Are you not on Skillshare yet? You can check out all of my classes using the free 1-month trial: Join me on Skillshare here to access all of these classes + lots more. This post contains affiliate links. This means if you buy something (like a Skillshare membership) through one of these links, I get a commission at no cost to you!
Subscribe to my monthly newsletter for regular updates: